Saturday 25 February 2017

Colorbar Precision Waterproof Eyeliner Review

Hi guys.Hope you all doing well.

          In this week’s blogpost, I will be reviewing the Colorbar Waterproof Liquid Eyeliner.

 I am someone who has always loved using the stick liners or markers and was never a big fan of liquid liners. I have used liquid liners in the past but I wasn't impressed by any of them particularly. However, I wanted a matte liquid liner and I came across this Colorbar liquid liner about a month back. Since then I have only been using this product and the results have been great.

So without any further ado lets get into the review.


Price

Rs. 350 for 2.5ml 


Packaging

The liquid liner is packed in a silver box, which has the name and details mentioned. 
The liquid liner is packed in a black bottle with a long silver cap.
It is really small and light weight, making it easy for you to carry in your bag. 
It has a felt tip applicator which works really well for me, to apply a thin liner or even while making a wing.


Colour


 The Colorbar Liquid Liner is available only in black in a matte finish.


Claims

The Waterproof Liquid Eye Liner is long-lasting and does not smudge, crack, flake or peel. With its high definition flexible felt tip applicator, one stroke is enough to define a fine or thick line. Fast drying, Waterproof Liquid Eye Liner is suitable for sensitive eyes and those who wear contact lenses too.


Longevity

This liquid eyeliner lasts for a really long time. It lasts for about 10 hours easily. Towards the end of the day it does tend to get a little dull. However it stays throughout the day without peelings or smudging.It dries matte, almost immediately after the application and it is completely waterproof and smudge proof.


Pros

Waterproof and smudge proof
long lasting and dries immediately
The felt tip works well 
Does not irritate the eyes
Trave friendly


Cons

The quantity is a little less.
Felt tip may not be suitable for everyone .


Verdict

This has become one of my favourite liners within no time. Since I have started using this liquid liner, I haven’t gone back to any of the stick liners. This is a really good choice if you’re looking for a matte liquid liner, which is waterproof and long lasting. All those who are confident with applying liquid liners with a felt tip, you should definitely consider this for your next buy. If you are not very sturdy or have shaky hands, you could always stick to the felt stick liner. 
This is definitely one of my favourites and something I highly recommend.  


That’s all for this post. I hope this review was helpful. We shall be back with a blogpost next week.

For regular updates, follow our Facebook page https://www.facebook.com/compactmatters/


Photography Credits: Sakshi Pitale 

Saturday 18 February 2017

Innisfree It's Real Squeeze Mask Review.

Hey guys! Hope you all are doing well.

In this week’s post, I will be reviewing the Innisfree It’s Real Squeeze Mask.

In the past, I have spoken about the Innisfree It’s Real Squeeze Mask on Compact Matters. It is a sheet mask from the Korean skincare brand, Innisfree. It is available in their stores in Mumbai and Delhi and on the Nykaa website.

 I really enjoyed using the Tea Tree variant and it helped clear out my break outs.  So when Nykaa came out with “ 10 for the price of 5” offer, I jumped and called for a bunch of them. However since I am constantly trying new products for the blog, I totally forgot about them. For a month, I was constantly having breakouts one after the other. I stuck to my skincare routine very strictly but for some reason nothing seemed to work well enough. Then not of nowhere, I just used the Innisfree It’s Real Squeeze Mask in Tea Tree and in 2 days all my acne had settled. So I decided to dedicate an entire post for the Innisfree It’s Real Squeeze Mask. 


Price

The Innisfree It’s Real Squeeze Mask retails for Rs.100

Variants

The Innisfree It’s Real Squeeze Mask is available in 14 variants in India. I have most of the variants excluding rose, kiwi and bamboo.

Packaging

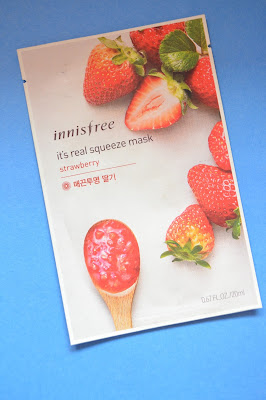
The Innisfree It’s Real Squeeze Mask comes in a plastic packet with the picture of main ingredient along with the name in front.At the back, majority of the instructions are in Korean since Innisfree is a Korean brand. However there is a sticker that has some instruction and precautionary measures mentioned in english. There is a hinge from which you can tear the packet open with your hands. It is placed well so that you do not need up tearing the sheet mask while opening the packet. Once you open the packet,you will find the sheet mask inside folded well.

Fragrance

The Innisfree It’s Real Squeeze Mask has a strong fragrance of the main ingredient. This fragrance does not seem chemically and has a fresh and natural feeling to it.

Application

The Innisfree It’s Real Squeeze Mask should be used once you are done cleaning and toning your face.
Once you open the packet, you remove the sheet mask carefully. You unfold it and hold it upright right before your face. The sheet mask may or may not fit your face perfectly as the shape of everyone’s face is a little different.  However place the area for the eye holes and mouth hole properly and try to cover as much area of your face possible with the sheet. You can keep it on for 20- 30 minutes after which you must throw it out. Do not wash off the serum of your face. Let your skin absorb it.The mask is meant only for 1 time use.The packet of the sheet mask may have some extra serum. You can put the packet into your fridge and use it another time in the week. You can use the mask twice a week or whenever you feel your skin needs something extra.

Different Variants


Tea Tree works best for acne prone skin.


Lime helps dull skin become more radiant.


Bija help reduce pimples and break outs due to its anti-bacterial properties


Cucumber hydrates the skin and reduces puffiness.

Manuka Honey helps heal damaged skin and oxgenates pores to draw bacteria.


Green Tea helps restore the balance in the skin since it is high in anti oxidants.


Pomegranate helps reduce wrinkles and keeps your skin firm.


Strawberry helps lighten blemishes while fighting acne.


Blackberry helps rejuvenate the skin since it has has a lot of anti oxidants.

Aloe helps repair damaged skin.


Shea Butter helps your skin remain fresh and hydrated since it is rich in Vitamin E.


Pros

It is very cost effective.
It is easy to use.
It is well packaged.
There are different variants for different skin types and different skin problems.
It fulfils its claims.
Neither does it make your skin oily nor does it try it too much.


Cons

It can and should be used only once.
You can not move around too much.

My Verdict.

The Innisfree It’s Real Squeeze Mask is totally worth your time and money. Luckily for me, I knew what works for my skin so the Tea Tree variant did wonders for me.  So it might take you a few masks to know which one works best for you skin but once you do find it, it will be awesome.  Whenever you do, I suggest stock up on the masks whenever Nykaa has the 10 for the price of 5 offer.

That is all for this post. If you have any questions or suggestions, leave it down in a comment.
For regular updates, follow our Facebook page https://www.facebook.com/compactmatters/
Photography Courtesy: Shivam Bhatt

Saturday 11 February 2017

How I Clean My Beauty Blender.

Hi guys! Hope you all are doing well.

In this week’s post, I will be sharing how I clean my beauty blender or make up sponges.

Like I mentioned in my post on How I Clean My Brushes, it is extremely important to clean your make up tools regularly in order to prevent the growth of any sort of bacteria on it. The beauty blender is my favourite make up tool since it can be used for so many things I own the original Beauty Blender. However I prefer the PAC Beauty Blender over it. 
If you would like to me to do a post on it, comment below.

A lot of bloggers like using the same method I shared in my How I Clean My Brushes post
 for their beauty blender. However I personally feel the sponge soaks in too much of the solution and washing it off damages the beauty blender.

Luckily, PAC launched a dupe for the Beauty Blender Solid Cleanser. It is packaged similarly and does an equally good job. However is much more affordable.

Price.

The PAC Solid Brush Cleanser retails for Rs.600 for 32g on Amazon.

Packaging.

The PAC Solid Brush Cleanser comes in a spherical box with cleanser placed inside.


Fragrance.

The PAC Solid Brush Cleanser has a mild fragrance but it does not transfer into the beauty blender.

Usage.

Wet the dirty beauty blender throughly. Dip it into the solid cleanser. Massage it gently over the spots it has been stained. Repeat the process until all stains have disappeared. This usually takes around 2-3 minutes. 
Ensure there is water left in the solid cleanser box as it would cause the cleanser to melt.
You can use the PAC Solid Brush Cleanser to clean brushes as well. However I feel it is more suitable for Beauty Blenders and make up sponges.

Stained PAC Beauty Blender


PAC Beauty Blender after it has been washed.


Alternative Method.

If you do not want to spend on a solid cleanser, you can use a face wash instead. Just wet the blender and apply the face wash all over it. Gently massage it especially on spots it has been stained. This method takes a little longer to clean and dry but works equally well. You can use any face wash. I recommend a face wash with anti bacterial properties like the VLCC Alpine Mint & Tea Tree Face Wash.


That is all for this post. If you have any questions or suggestions, leave it down in comment.
For regular updates, follow our Facebook page https://www.facebook.com/compactmatters/
Photography Courtesy:Shivam Bhatt.

Saturday 4 February 2017

How I Clean My Brushes

Hey guys! Hope you all are doing well.

In this week’s post, I will be sharing how I clean my make up brushes.

It is important to clean your make up brushes as regularly as possible or they might turn into a breeding ground for germs. They may even cause break outs. This happens at a quicker pacer in the humid Indian climate.

Not cleaning your make up brushes is not only super unhygienic, it also ruins your make up. It hampers the ability of the tools to do their job to its best capacity. Thus it is super important to clean atleast once in 2 weeks.

How I clean my brushes


Take A Big Bowl.

This should be a steel or plastic bowl preferably.


Add Shampoo To It.

The shampoo should be a mild shampoo.  4-5 pumps of it should be more than enough.


Add Tea Tree Oil.

Some people add conditioner and anti septic soap. However adding tea tree oil reduces the items required since it keeps the moisture in the bristles intact and ensures there are no germs. 4-5 drops of the oil are more than enough.


Add Water.

Add about 2-3 table spoons of water.


Wet The Brushes And Dip Them Into The Bowl.

The brushes must be made wet by holding them under running water.  The part under the bristles or the hair of the brush is known as the ferrule. The ferrule has the glue holding the bristles in shape. Thus water should not go into the ferrule or else it should lead to shedding of bristles.


Rub The Brushes On A Hot Water Bag.

Hot water bags are made of rubber and often have ridges on them. This makes it a perfect inexpensive dupe for the Sigma cleansing glove. So take your brush under running water and rub it in gentle motions according to the shape of the brush. Ensure your strokes are not ruining the natural shape of the brush. Rub it until all the visible make up and the solution you made has been washed out.


Let The Brushes Dry.

It is essential to never let the brush straight up since the water might seep into the ferrule area. I lay the brushes on a newspaper and let them dry over night.


That is all for this post. If you have any questions or suggestions, leave it down in a comment.
For regular updates, follow our Facebook page https://www.facebook.com/compactmatters/
Photography Courtesy: Shivam Bhatt.